
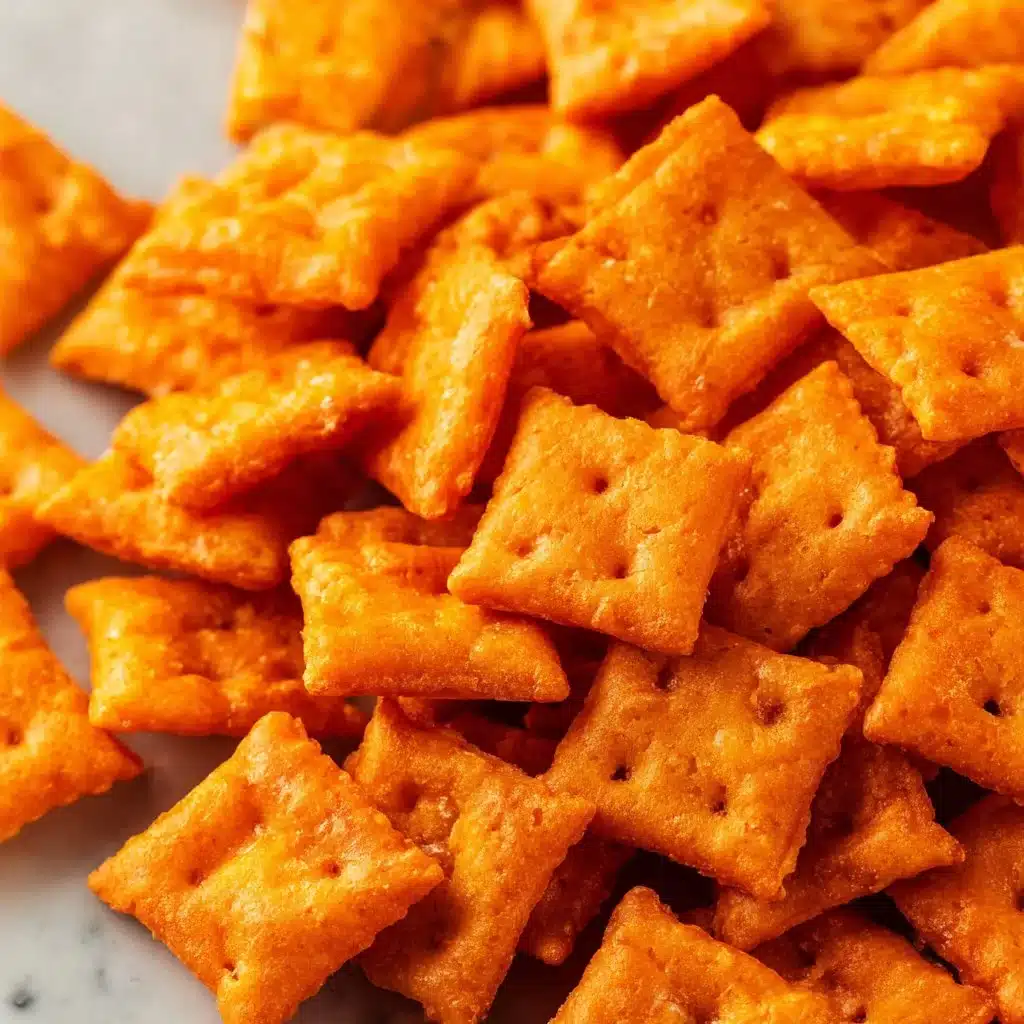
Hey there, snack lover! If you’ve ever found yourself craving the cheesy, crunchy goodness of Cheez Its but want a homemade twist, you’re in for a treat. Today, we’re diving into the world of DIY snacking with this delightful recipe for Homemade Cheez Its. These little bites of joy pack all the flavor you remember but made with simple, wholesome ingredients right from your kitchen. So, grab your apron and let’s create something wonderfully cheesy together!
Why This Recipe is Worth Making
You might be wondering, why go through the effort of making Cheez Its at home when you can conveniently buy them at the store? Well, let me share with you the best reasons to try this recipe! First and foremost, homemade Cheez Its are made with real cheese, sharp cheddar, to be exact, giving you a rich, authentic flavor that pre-packaged options simply can’t compete with.
Next, you control what goes into these crispy snacks. No artificial flavors, preservatives, or mystery ingredients here! You’re left with a mix of flour, butter, and a sprinkle of salt, making for a totally customizable and guilt-free snack option. Plus, there’s something so satisfying about knowing you made these cheesy wonders from scratch. They also make a delightful addition to gatherings or a cozy movie night, adding a personal touch that your friends and family will appreciate.
How to Make Homemade Cheez Its
Now that you know why you’ll love this recipe, let’s get into how to prepare these delicious homemade Cheez Its!

Ingredients
- 8 ounces sharp cheddar cheese, shredded
- 1 cup all-purpose flour
- 1/2 teaspoon salt, plus more for topping
- 1/4 cup unsalted butter, cubed
- 2 tablespoons whole milk (cold)
Directions
- Preheat the Oven: Start by preheating your oven to 325°F. Line two baking sheets with parchment paper to ensure your Cheez Its don’t stick during baking.
- Mix Ingredients: In a food processor, combine the shredded cheddar cheese, all-purpose flour, and 1/2 teaspoon salt. Pulse several times until everything is mixed thoroughly.
- Add Butter: Add the cubed unsalted butter to the flour mixture in the food processor. Pulse a few more times until the dough looks crumbly and resembles coarse sand.
- Incorporate Milk: Slowly add the cold whole milk into the mixture while pulsing. The dough won’t come together in a ball, but it should easily hold when pressed between your fingers.
- Roll Out: Transfer the crumbly dough onto a lightly floured surface. Roll it out into a large rectangle, making it as thin as possible, aim for less than 1/8-inch thickness since they puff a bit while baking.
- Cut Crackers: With a sharp knife, pizza cutter, or fluted pastry wheel, slice the dough into 1-inch squares. Use the flat end of a skewer or toothpick to poke a hole through the center of each cracker.
- Sprinkle with Salt: Transfer the cut squares onto the prepared baking sheets and sprinkle a little extra salt on top for added flavor.
- Bake: Place the trays in the oven and bake them for 17-20 minutes. Keep an eye on them, when the bottoms are deep golden brown, they are ready. If they are too light, they will lack that satisfying crunch.
- Cool Down: Once baked, let them cool completely on the sheets. Enjoy every irresistible bite!
Best Ways to Serve Homemade Cheez Its
So, what’s the best way to enjoy these cheesy treats? You really can’t go wrong! Serve them straight up for snacking while binge-watching your favorite show, or pair them with a creamy dip like ranch or guacamole for a fun appetizer. You could even place them on a charcuterie board alongside some cured meats, olives, and fruits for a delightful party platter. Your guests will be raving about these homemade goodies!
Keeping Your Homemade Cheez Its Fresh
To get the most out of your delicious homemade Cheez Its, here are some storage tips:
- Airtight Container: Place your cooled Cheez Its in an airtight container. This will keep them fresh and crispy for longer.
- Room Temperature: Store them at room temperature, away from direct sunlight. They’ll stay fresh for up to a week.
- Freeze for Later: If you want to save some for later, you can freeze them! Just layer parchment paper between the squares and place them in a freezer-safe bag. When you’re ready for a snack, simply pop them in the oven for a few minutes to re-crisp.
Pro Tips for Perfect Homemade Cheez Its
- Cheese Variety: While sharp cheddar is classic, feel free to experiment with different cheese varieties. Pepper Jack can add a nice kick, or a mix of cheeses can create a unique flavor.
- Thickness Matters: If you prefer crunchier crackers, roll the dough a bit thinner. Just remember, they will puff slightly while baking.
- Taste as You Go: Don’t hesitate to taste the dough mixture before baking. Adjust the salt to your liking or add in some spices for an extra flavor boost.
Delicious Variations of Homemade Cheez Its
If you’re feeling adventurous, try these creative twists on the traditional recipe:
- Herb-Infused: Add dried herbs like rosemary or thyme to the dough for an aromatic touch.
- Spicy Kick: Mix in a dash of cayenne pepper or chili powder for a spicier version that’s sure to wake up your taste buds.
- Cheesy Parmesan: Combine cheddar with freshly grated Parmesan for an extra cheesy flavor profile that’s unbeatable.
FAQs
Can I use different types of cheese?
Absolutely! Feel free to experiment with your favorite cheese varieties. Just remember that moisture content can vary, so you may need to adjust the flour or milk slightly.
How do I know when the Cheez Its are done?
Check for a deep golden brown color on the bottom. If they are too light, they will lack that satisfying crunch we all love.
Can kids help make these snacks?
Definitely! This recipe is easy and fun for kids to help with. They can assist with mixing, rolling, and cutting. It’s a great way to get them involved in the kitchen!
Now you have everything you need to whip up a batch of these delightful homemade Cheez Its. They are not just a snack; they’re a little farm-to-table experience you can share with loved ones. So, what are you waiting for? Get in that kitchen and make some cheesy magic happen!
PrintDelightfully Crunchy Homemade Cheez Its

A delightful recipe for homemade Cheez Its featuring sharp cheddar cheese, butter, and a touch of salt, perfect for snacking or serving at gatherings.
- Prep Time: 15 minutes
- Cook Time: 20 minutes
- Total Time: 35 minutes
- Yield: 4 servings
- Category: Snack
- Method: Baking
- Cuisine: American
- Diet: Vegetarian
Ingredients
- 8 ounces sharp cheddar cheese, shredded
- 1 cup all-purpose flour
- 1/2 teaspoon salt, plus more for topping
- 1/4 cup unsalted butter, cubed
- 2 tablespoons whole milk (cold)
Instructions
- Preheat your oven to 325°F and line two baking sheets with parchment paper.
- Mix the shredded cheddar cheese, flour, and 1/2 teaspoon salt in a food processor until well combined.
- Add the cubed butter and pulse until the mixture resembles coarse sand.
- Incorporate the cold milk slowly into the mixture while pulsing until it holds together when pressed.
- Roll out the dough on a floured surface into a rectangle, aiming for less than 1/8-inch thickness.
- Cut the dough into 1-inch squares and poke a hole in each cracker.
- Sprinkle extra salt on top of the squares before baking.
- Bake for 17-20 minutes, until the bottoms are deep golden brown.
- Cool completely on the baking sheets before serving.
Notes
Feel free to experiment with different cheese varieties for unique flavors.