
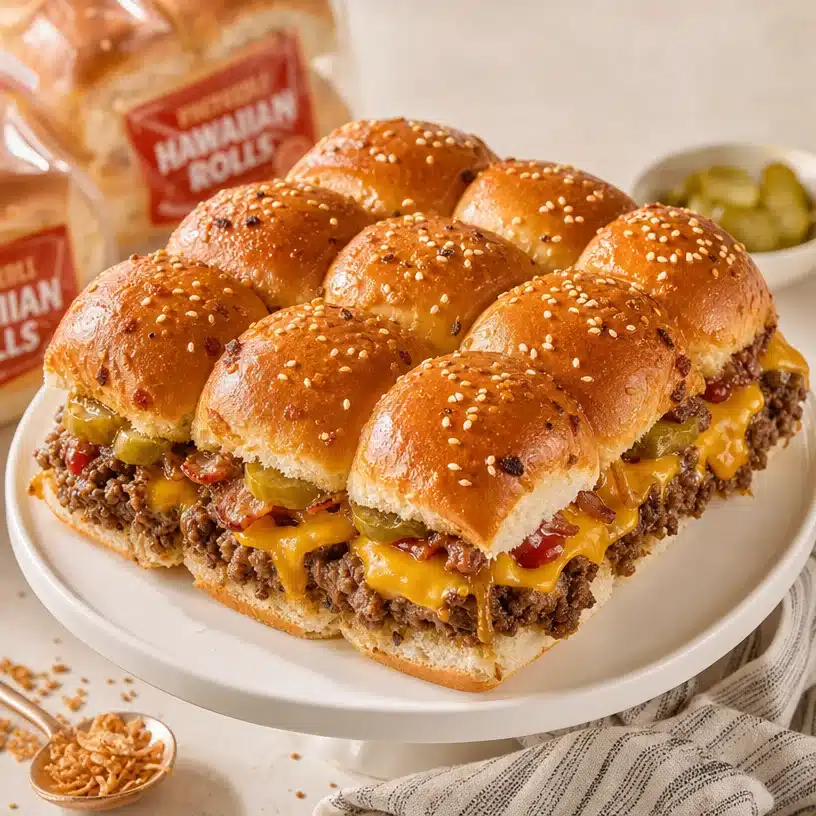
Hello, fellow food lovers! If there’s one thing I know for sure, it’s that sliders are absolute magic when it comes to feeding a crowd and bringing everyone together. The Best Cheeseburger Sliders are exactly what you need for game nights, family gatherings, or just a cozy night in. They pack all the flavors of a classic cheeseburger into bite-sized pieces that are deliciously satisfying! Join me in this culinary adventure, and let’s create something wonderful together.
Why You’ll Love This Cheeseburger Sliders Recipe
So, why should you dive into making these cheeseburger sliders? They’re not just any sliders; they’re a flavor bomb wrapped in soft, sweet Hawaiian rolls that will leave everyone wanting more.
- Simplicity: This recipe is incredibly simple, meaning you won’t be spending hours in the kitchen. With just a few effortless steps, you’ll have a delicious dish ready to serve!
- Flavorful: The combination of ground beef mixed with French onion soup adds a depth of flavor that makes these sliders unforgettable. Who knew something so easy could taste so gourmet?
- Customizable: You can personalize your sliders with a variety of toppings. Whether you’re a pickle lover or a bacon enthusiast, the choice is all yours!
- Perfect for Any Occasion: Be it a summer BBQ, a game day feast, or a cozy family dinner, these sliders fit right in. They are sure to impress your guests and satisfy your cravings!
- Just the Right Size: Sliders are perfect for portion control! You can enjoy one (or two) without feeling too guilty.
With these reasons in mind, it’s time to roll up your sleeves and get cooking!
How to Make Cheeseburger Sliders
Ready to learn the magic behind these sliders? Let’s dive into the steps that will have you serving the BEST Cheeseburger Sliders in no time.
Ingredients:
- 2 Packs Hawaiian Rolls
- 2 lbs. Ground Beef
- 2 Packets French Onion Soup Mix
- 1.5 cups Shredded Cheddar Cheese
- 1/2 cup Mayo
- 6 slices American or Cheddar Cheese
- 1 tbsp. Melted Butter
- 1 tbsp. Sesame Seeds
- Optional Toppings: Pickles, relish, ketchup, mustard, caramelized onion, bacon
Directions:
- Preheat your oven to 350°F (175°C). This step is essential to give your sliders that perfect golden finish.
- In a mixing bowl, combine the ground beef with the French onion soup mix. Shape this mixture into slider-sized patties.
- Now, let’s slice the Hawaiian rolls in half and place the bottom halves in a baking dish.
- Place the slider patties on the rolls. Top each patty with a generous amount of shredded cheddar cheese along with a slice of American or cheddar cheese for that melty goodness.
- Spread mayo on the inside of the top halves of the rolls and place them gently on top of the sliders.
- Brush the tops with melted butter and sprinkle sesame seeds for that beautiful finish.
- Cover the dish with foil and back for 15-20 minutes, until the cheese is melted and gooey.
- To achieve a lovely golden top, remove the foil and bake for an additional 5 minutes.
- Serve warm with your choice of toppings for extra pizzazz!
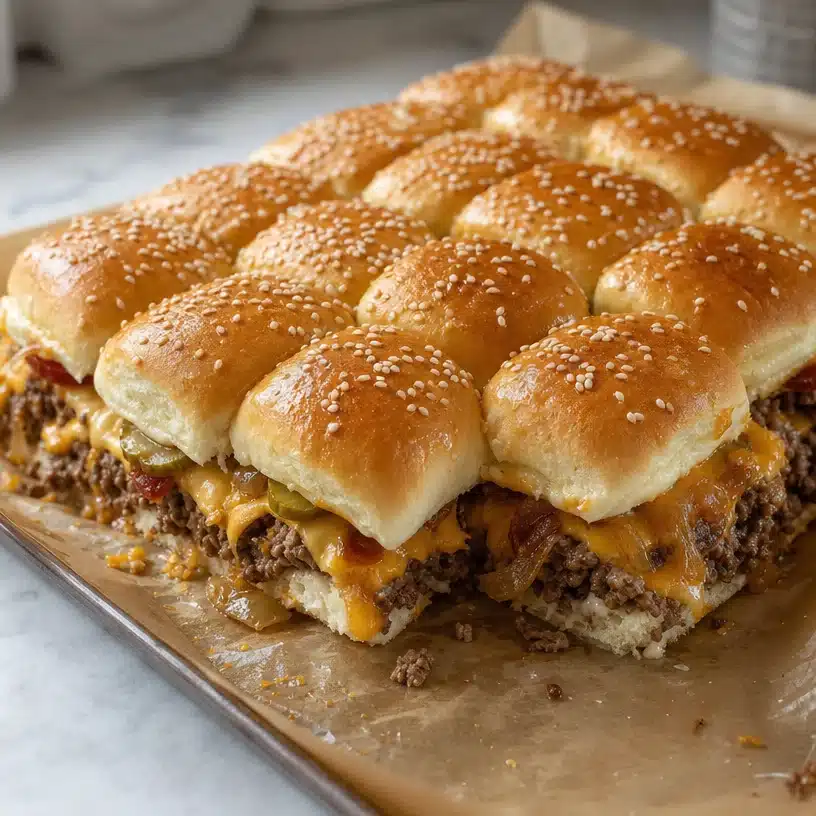
Best Ways to Serve Cheeseburger Sliders
When serving these delectable sliders, presentation matters! Here are some tips to make them even more inviting:
- Tray it Up: Use a decorative platter to serve the sliders, leaving room for optional toppings on the side. This makes everyone feel like they’re at a real banquet!
- Garnish: Add a few sprigs of parsley or some colorful fresh vegetables to the arrangement for an added pop of color.
- Toppings Station: Set up a toppings station with various sauces and toppings to allow guests to customize their sliders as they like. It’s interactive and fun!
- Pair with Sides: These sliders go beautifully with some crispy fries, a fresh salad, or even a cheesy dip.
Storage Tips for Cheeseburger Sliders
If you’re lucky enough to have leftovers (though I doubt it), here’s how to keep your sliders fresh:
- Refrigerate: Wrap any leftover sliders tightly with plastic wrap or place them in an airtight container and store them in the fridge. They’ll last for about 3-4 days.
- Reheat: To reheat, simply pop them back in the oven at 350°F (175°C) for a few minutes until warmed through. This will help retain that delicious melted cheese!
- Freeze: If you want to store them for longer, consider freezing the cooked sliders. Just make sure to wrap them individually or in sets. They can be reheated in the oven directly from the freezer.
Expert Tips for Perfect Cheeseburger Sliders
- Use Quality Beef: Opt for a ground beef with a good fat content (80/20 is a great choice) to keep the patties juicy.
- Don’t Over-mix: When forming patties, avoid overworking the beef mixture to ensure tender sliders.
- Experiment with Cheese: While cheddar is a classic choice, try mixing in a bit of blue cheese or pepper jack for an exciting twist!
- Let Them Rest: Allow the sliders to rest for a few minutes after they come out of the oven. This helps the flavors meld together.
Delicious Variations of Cheeseburger Sliders
Let’s get creative with some variations of these sliders:
- BBQ Sliders: Mix barbecue sauce into the ground beef for a tangy flavor boost. Top with crispy onion rings for added crunch.
- Mushroom Sliders: Add sautéed mushrooms and Swiss cheese for a savory spin. This vegetarian-friendly option can also be made just for the mushroom lovers in your life!
- Bacon-Cheddar Sliders: Who doesn’t love bacon? Sprinkle crumbled bacon on top of the cheese before baking for that smoky flavor.
- Tex-Mex Sliders: Spice things up by adding taco seasoning to the beef and topping with guacamole and fresh cilantro.
FAQs
Are cheeseburger sliders better with fresh or frozen beef?
Fresh ground beef gives the best flavor and texture. However, you can certainly use frozen if that’s what you have on hand. Just make sure to thaw it properly before cooking.
Can I use gluten-free rolls for the sliders?
Absolutely! Just substitute gluten-free Hawaiian rolls for the regular ones, and you’ll still enjoy the same deliciousness.
How do I make these sliders vegetarian?
You can swap the ground beef for black beans, chickpeas, or even a veggie burger mix to create a delightful vegetarian version!
I hope these best Cheeseburger Sliders bring joy and deliciousness to your gatherings! Each bite is a celebration and a reminder that great food can create amazing memories. Happy cooking!
PrintThe BEST Cheeseburger Sliders
Delicious cheeseburger sliders wrapped in soft Hawaiian rolls, perfect for any occasion.
- Prep Time: 15 minutes
- Cook Time: 25 minutes
- Total Time: 40 minutes
- Yield: 8 servings
- Category: Appetizer
- Method: Baking
- Cuisine: American
- Diet: Omnivore
Ingredients
- 2 Packs Hawaiian Rolls
- 2 lbs. Ground Beef
- 2 Packets French Onion Soup Mix
- 1.5 cups Shredded Cheddar Cheese
- 1/2 cup Mayo
- 6 slices American or Cheddar Cheese
- 1 tbsp. Melted Butter
- 1 tbsp. Sesame Seeds
- Optional Toppings: Pickles, relish, ketchup, mustard, caramelized onion, bacon
Instructions
- Preheat your oven to 350°F (175°C).
- Combine the ground beef with the French onion soup mix and shape into slider-sized patties.
- Slice the Hawaiian rolls in half and place the bottom halves in a baking dish.
- Place the slider patties on the rolls and top with shredded cheddar cheese and a slice of American or cheddar cheese.
- Spread mayo on the inside of the top halves of the rolls and place them on top of the sliders.
- Brush the tops with melted butter and sprinkle sesame seeds.
- Cover the dish with foil and bake for 15-20 minutes.
- Remove the foil and bake for an additional 5 minutes to achieve a golden top.
- Serve warm with your choice of toppings.
Notes
Customize your sliders with various toppings to suit your taste.